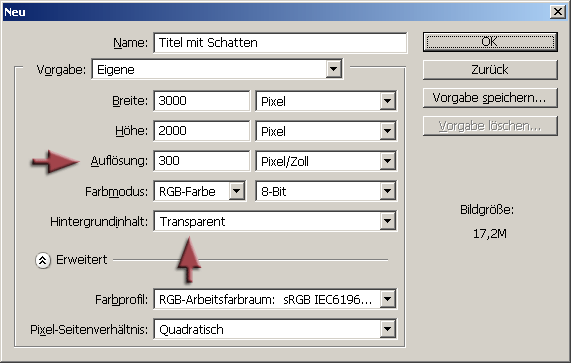
Although Wings Vioso RX offers text objects which allow simple and fast title creation we would like to offer you an alternative form of title creation based on Photoshop. The explanations in this example refer to Photoshop CS, but in principle the approach will be the same for other programs as well.
Create a file at the corresponding size with a transparent background. Select a resolution of 300 pixels/inch for the text to allow reasonable scaling.

Choose the text tool and create a layer containing the title text. Set the font size to about 60 pixels. Choose the text color to match the planned background image.
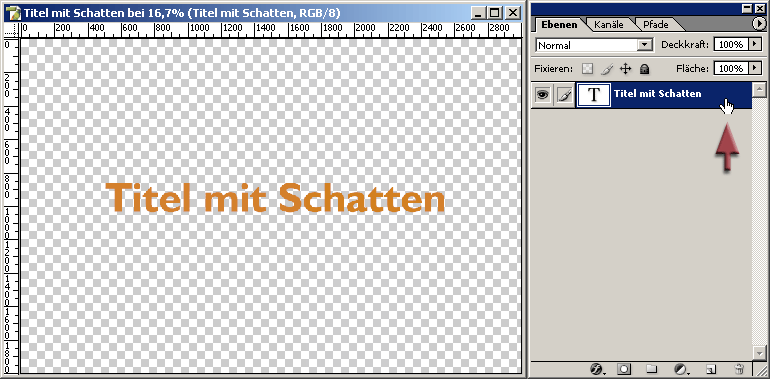
Double-click the text layer on the right next to the text and the dialog for effect selection will open up. Place a checkmark next to Drop Shadow, as well as Bevel and Emboss and Contour.
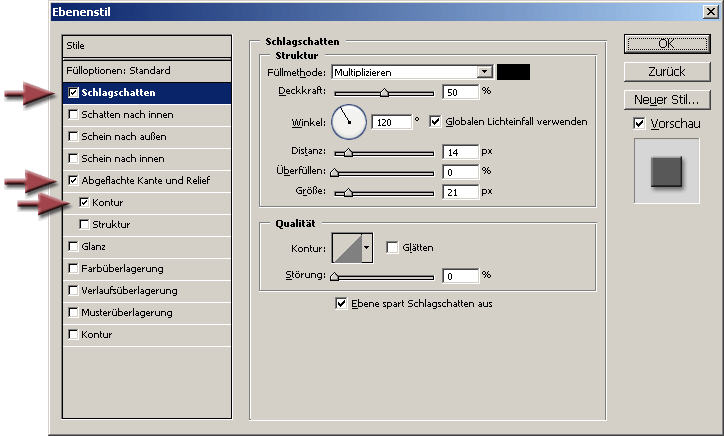
The shadow opacity default setting of 75 % is usually somewhat too dark. To be able to judge the effect better you should add a new layer via Shift + Ctrl + N and choose a color that corresponds more or less to the planned background picture in the show.
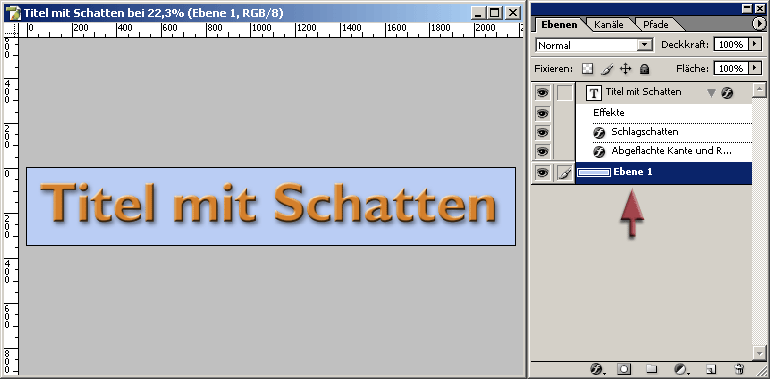
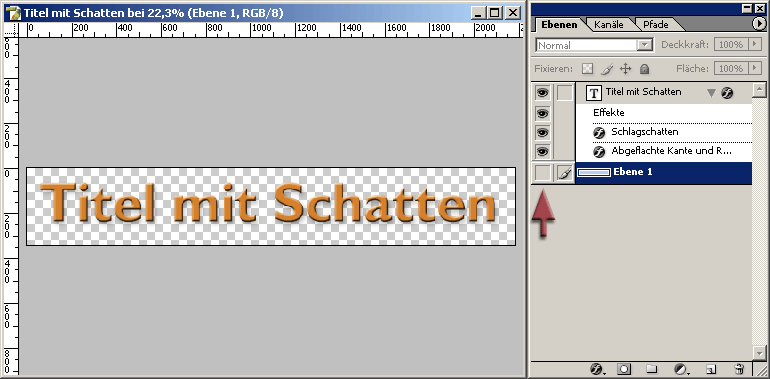
In the illustration above the title image has already been cropped since the unused areas would use up graphics memory unnecessarily during the presentation. The text can later on be positioned in Wings Vioso RX via In-Screen Editing and Keyframes.
Before saving you need to hide the background layer Level 1 for the checkerboard pattern to be come visible and the background to turn transparent.
Save the title image as a TIF file. This allows further editability of the layers and guarantees a proper shadow. If you chose PhotoShop format, for example. the shadow in Wings Vioso RX sometimes has a grayish color. For TIFF options choose the following:
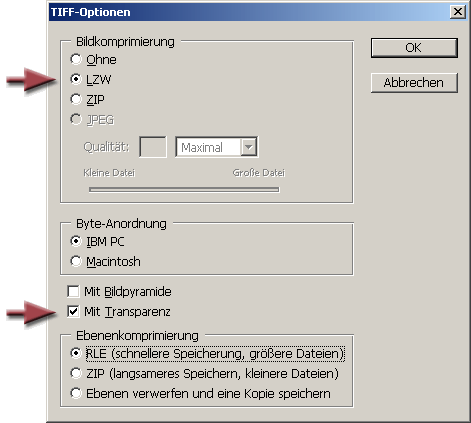
LZW compression produces smaller files and option Save transparency generates the appropriate alpha channel for transparent display. Further information on transparency and alpha channels can be found in the documentation for your image editing software.
This completes the tile and allows you to combine it in Wings Vioso RX with many different background images as explained starting from item 16 in workshop Editing sequences of pictures and objects. How to adjust the size to match your motifs can be found under Motion: Position - Zoom - Rotation.
If you find that the shadow is still too dark or the font does not fit you can still change these without any problems. An elegant and interactive approach to this is described in topic External editing of media files.