Using a uEye camera
If you want to use a uEye camera for Vioso calibration proceed as follows:
-
Connect your uEye camera to the network and the Wings Engine.
-
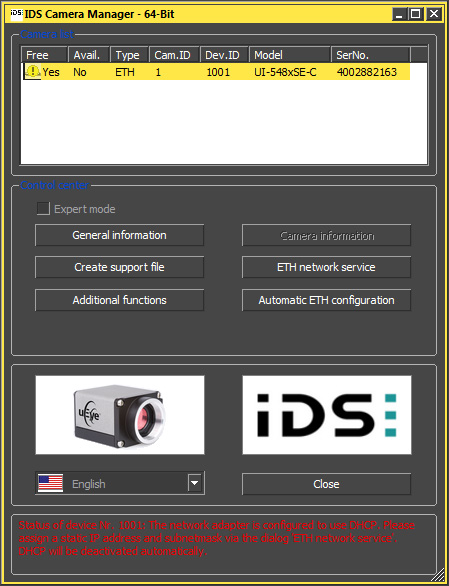
Click  , followed by clicking on Settings and open the uEye Camera Manager.
-
At the top of the field the camera is displayed with an exclamation mark. This indicates that its address is in a different address range.
-
Click Automatic ETH configuration and the IP address is adjusted to the address range used. If you want to define a fixed IP address yourself, enable Expert Mode and enter the desired IP address in the bottom right corner.
-
In the completion message click OK and close the uEye Camera Manager.
The camera is now ready for use. Before you start the Vioso calibration you should adjust sharpness and portion using the uEye Cockpit as the large-size window allows easier and more accurate settings.
-
Click shortcut uEye-Cockpit and button Live video in the dialog box popping up.
-
At the top left corner click Open camera for the camera image to be displayed. With a new camera or new software you may have some firmware update loaded onto the camera.
-
If the image does not show the required resolution and size click Camera properties and select tab Size.
-
At Profile choose the required resolution. Bear in mind that a higher resolution causes a lower frame rate and makes the calibration take longer.
-
Click tab AWB and select Off to disable automatic white balance. Close the properties dialog by clicking Close.
-
Now you can adjust sharpness and portion.
You can now continue with a Vioso calibration. See Camera-based calibration.